Email is a crucial tool in the modern world, and when it fails to work normally like sending mails, personal and professional routines can be disrupted. Windows Live Mail users of Telstra Mail, formerly called Bigpond, encounter issues with emails that they cannot send. In this blog, we will discuss multiple causes of these problems and provide step-by-step solutions to help you fix them swiftly.
Common Causes of Send Errors
- Network Issues: Poor or unstable internet connections hinder the sending of emails.
- Outdated Windows Live Mail: Using an older version of Windows Live Mail may make it incompatible with modern email servers.
- Corrupted Application Files: Application functionality may be negatively affected by corruption in Windows Live Mail’s application files.
- Security Software Interference: Sometimes, antivirus or firewall settings block out Windows Live Mail from letting any mail go through.
Step-By-Step Solutions
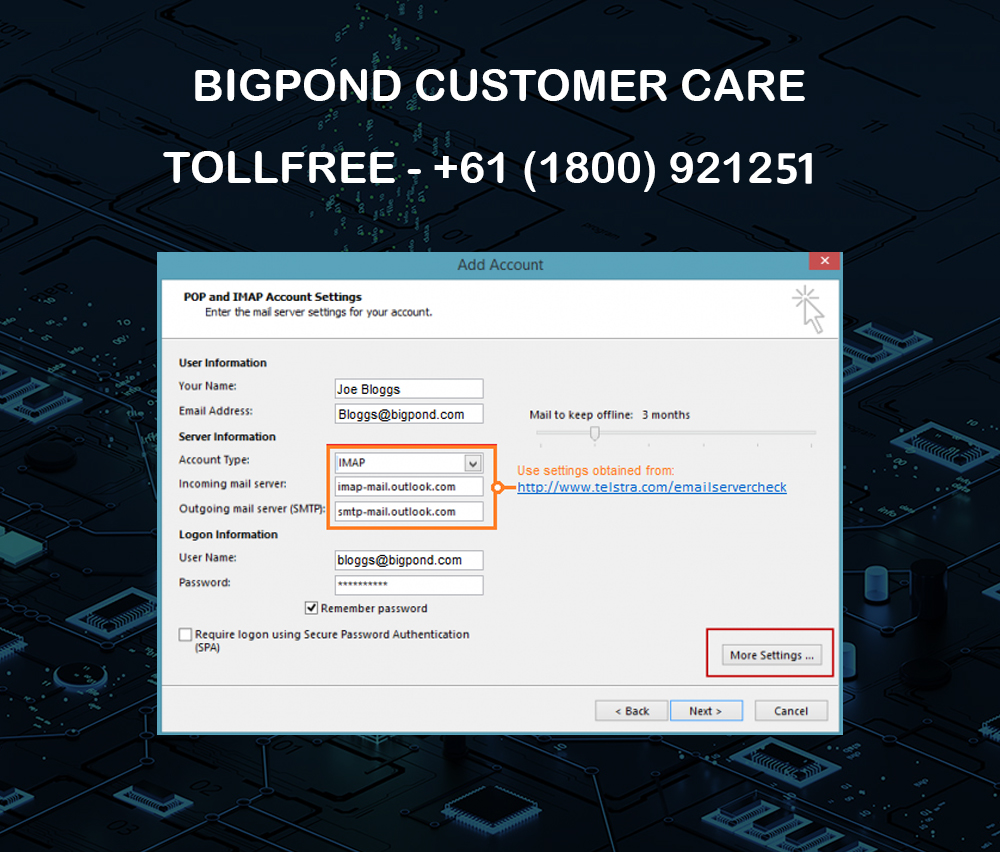
Step 1: Check Account Settings
Confirm Telstra mail settings for Windows Live Mail as below:
- Outgoing mail server (SMTP): smtp.telstra.com;
- Port number = 465 (with SSL);
- Authentication required & password: (your Telstra e-mail address).
To access the following settings on Windows Live Mail:
- Click ‘Accounts’ then choose your Telstra account;
- Proceed by clicking on ‘Properties’, followed by the ‘Servers’ tab;
- Examine details under ‘Outgoing Mail Server’.
Step 2: Test Your Network Connection
You can test your network quickly by trying to access other websites or online services. Restart your router if you do not connect successfully. Get in touch with your ISP if this does not help solve the matter at hand.
Step 3: Update Windows Live Mail
Make sure that you are using the latest version of Windows Live Mail. You can download the most current updates from the official Microsoft website. This will fix any software compatibility problems.
Step 4: Repair Windows Live Mail
If updating does not fix things, then repair the program as follows:
- Open Control Panel > Programs > Programs and Features.
- In the list, find Windows Live Mail, right-click and select ‘Repair’.
Step 5: Configure Security Software
Change firewall or antivirus settings so that outgoing mails are not blocked by them in Windows Live Mail. Adding an exception for Windows Live Mail in your antivirus program or firewall settings is necessary.
Step 6: Reinstall Windows Live Mail
If all else fails, try uninstalling and then reinstalling Windows Live Mail to correct corrupted application files causing issues. Be sure to back up your emails before uninstalling.
Conclusion
Although being faced with a send error on Windows Live Mail could be irritating, these steps usually help sort out such problems. Start by checking your account settings and confirming that your network connection is strong. Updating or fixing damaged files of Windows Live Mail should resolve most of its compatibility concerns if any. If there are still issues, then adjusting security settings or reinstalling the application might be required.
Do remember that regular maintenance and updates are very important when it comes to the proper working of email applications.