It’s essential to verify your Bigpond account in your Telstra account in order to assist in the management and security of your services. This step helps authenticate and secure access to your account. Whether you are creating a new Bigpond email and intend to use it or require changes to your existing one, the verification process is straightforward and quick with no frustrations on the users’ end.
Why You Need To Verify Your Account
Verification as an account requirement is a precaution against the exposure of private details and the stealing of identity. Verification of the Bigpond account through Telstra serves the purpose of ensuring that the user is the only individual who can access emails, settings and personal info. This is crucial to help the user avoid self-verification through the need to change contact details or register for new services.
How To Check and Change Your Bigpond Email Address
To begin the verification process, one has to be logged into both the Bigpond and Telstra accounts. The steps involved are quite a number and aim at authenticating the user while at the same time attaching the user’s Bigpond email to his or her Telstra address.
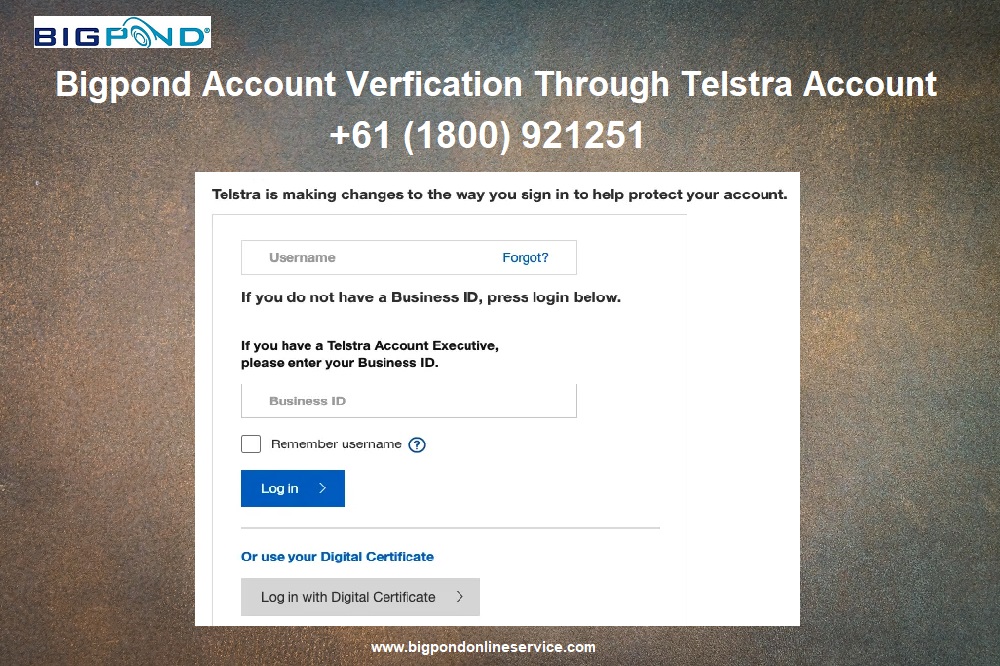
Step One: Log in to your Telstra account Click on the link Log In Telstra, which prompts you to enter a username and password. Logging into your account provides you access to certain services and features customized around your account.
Step Two: Manage services linkage on your account Link your Bigpond email to any active Telstra account by logging on to the account. Usually, options to add new links or manage existing links are available in the ‘Plans & Usage’ section or even within ‘Services’ directly.
Step Three: Link a New Email to Your Telstra Bigpond Account In this step, you will be asked to link your new Bigpond email account or manage the one already linked to your account. As part of the registration process, you will provide your personal information to be verified including your bigpond email address. Take time to read all the directions step by step so that none of the details are missed.
Step Four: Finish the Verification Telstra may ask for the Bigpond details and test them out. Telstra may send an SMS with a verification code, or the user can opt to receive it through email or another channel. Proceed to enter the provided code in the ‘over the phone’ instructions. With this, the two accounts will be linked going forward. Henceforth, the users will not have to separately log into their Bigpond accounts as they will be seamlessly managed through the Telstra account.
Step Five: Confirmation This is usually the last step where over email or on their account dashboard, clients should find a confirmation message. This message is typically sent by Telstra confirming that the client’s Bigpond account has been verified and is linked securely to their Telstra account.
Why This Matters
In other words, having the ability to manage such complex systems from a single interface significantly improves usability. In turn, the availability of such detailed personal accounts on Telstra increases the security of the account holder’s documents and personal information. These systems are made to help people as much as possible while keeping their information safe at the same time.
Conclusion
The verification of Bigpond right through a Telstra-controlled account is perhaps the most important procedure for users of these services. It makes certain that there is always security over the account, the personal details of a user remain confidential, and that there is synchronization while using the Telstra services. Apprehending these straightforward instructions will help you finish the verification process with minimal effort and thus increase your level of control over your telecommunications services while offering peace of mind. In case there are any problems in the procedures of verification, the customers can reach out to Bigpond Customer Support with all their concerns and complaints including issues with moving forward with the verification process.